Creating an Email Body Layout
|
This article relates to the following pro-Forms modules: |
Creating an Email Body Layout
An email Body layout is useful when creating an email trigger for a form - see article Adding an email Trigger for a form
- click on 'Manage' for the form you want to create the Layout for from the form list in the main menu 'Forms - home' option.
- click on 'Exports' from the top row of options. Then click on the green '+ Add New' button top right.
- give the new Layout a name - we usually recommend including the words 'email body' in the name to help distinguish it from other layouts for the form and when selecting it as part of setting up an email Trigger.
- from the 3 different layout types shown in the box below the name field select the option : 'I want to create my own Layout e.g. HTML Email, CSV, XML.'
- click the green 'Create Layout' button in the bottom right hand corner.
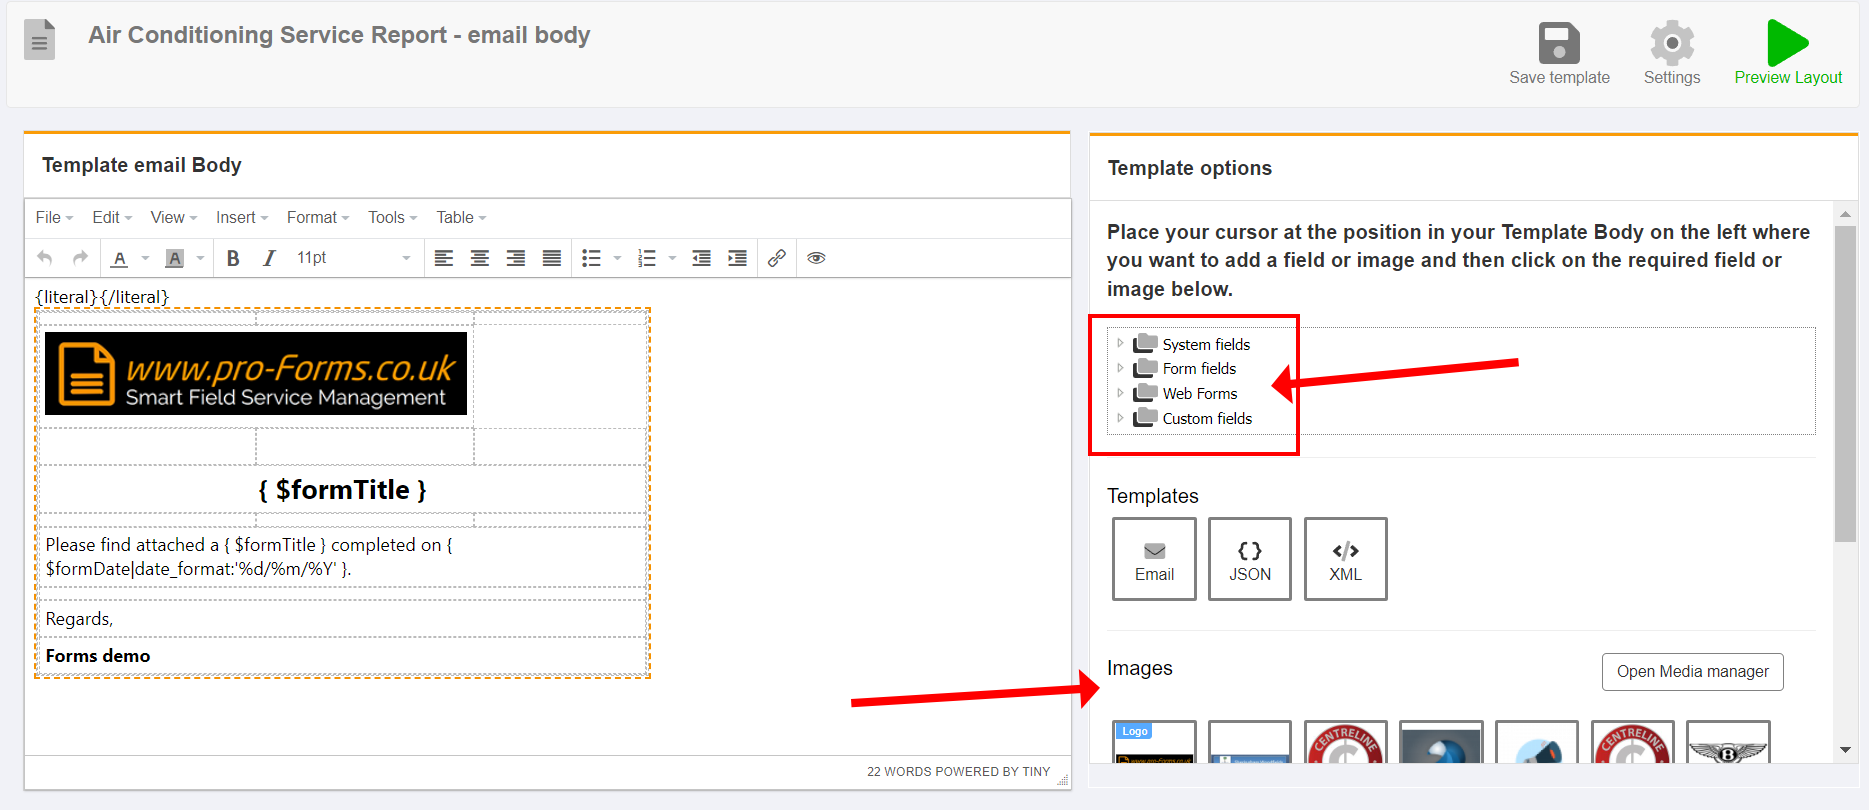
- Under the 'Templates' heading on the lower right hand of the screen click the 'Email' option. This will generate and email body template for you which will become visible on the left hand side of the screen under the heading 'Template Body'.
- You can then edit the content of the email body generate using the text styling and other options in the visual editor on the left. You can also add images by clicking on any of those shown on the right under the 'Images' heading as well as adding form field tags using the collapse & expand folder structure shown in the red box in Image 3 below.
- Adding form field tags to your email body will customise each email body created by a trigger to include data from the form submitted into the system. For example the email body could contain fields holding the name of the customer, a machine serial number or working status entered onto the form.
- When finished customising the email body click on the 'Save Template' icon on the top right.
Image 1
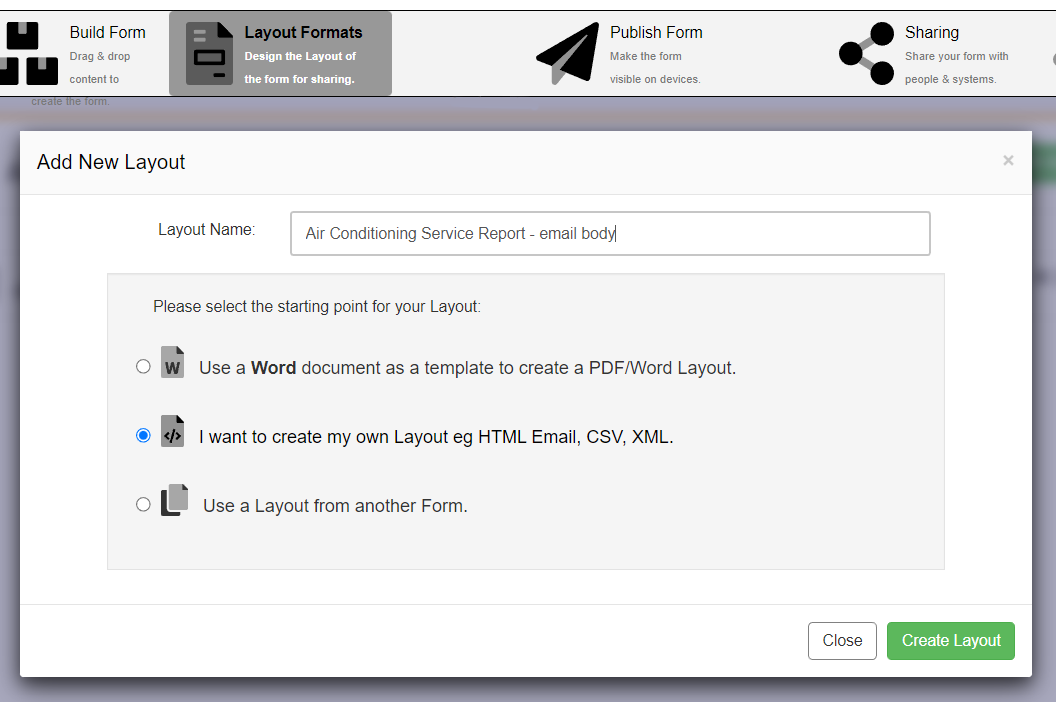
Image 2

Image 3