On-screen look of Online forms
Creating the on-screen look of an Online form
Where fields are positioned on an Online form can be determined by using a simple 'row and column' grid system.
Adding a combination of 1 row x 1 column, 1 row x 2 columns or 1 row x 3 columns to each page of a form provides cells into which form fields can be placed. This means fields can be grouped together by topic for example 'Name and address' or sat side by side e.g. 'Dated started' and 'Date finished'.
Using this method, forms become more attractive, easier to fill-in and with higher completion/ submission rates.
To create a grid layout you will need to follow these steps for EACH page on your form :-
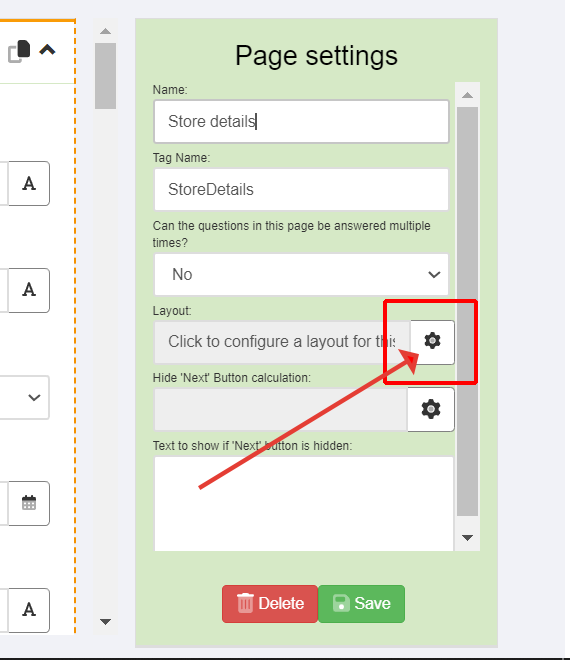
- in the page header click on '(Click to Configure)' to the right of the page name.
- in the green 'Page Settings' panel on the right click on the cog icon in the 'Layouts' option
3. On the screen that then loads, drag the required combination of rows & columns from the 3 options on the left hand side to middle area of the screen.
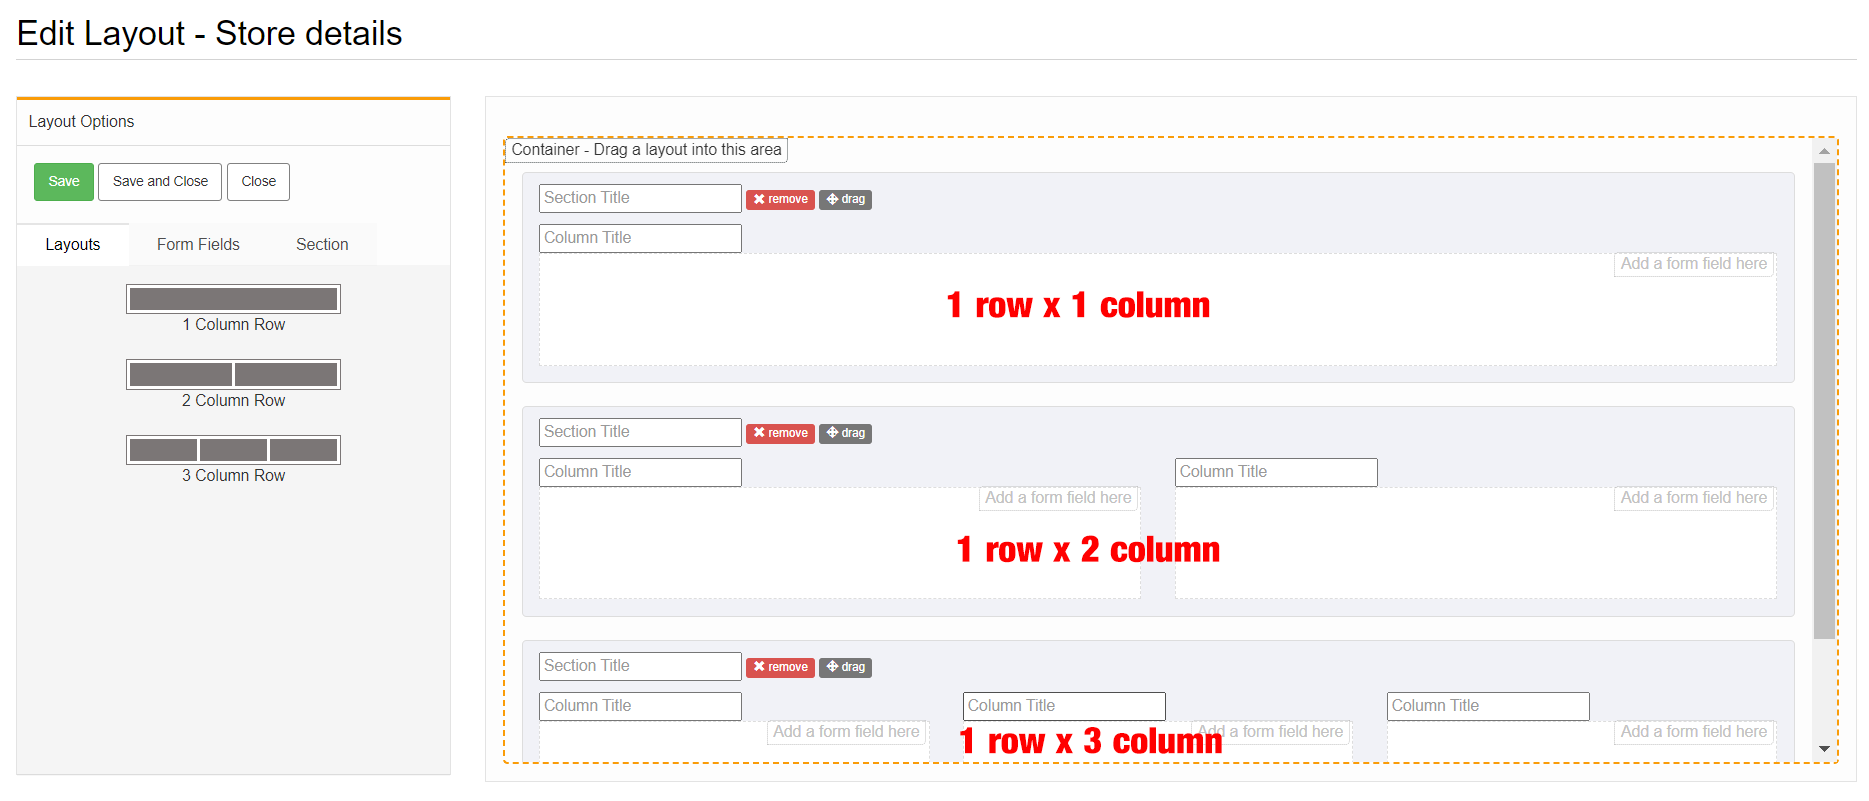
4. Click into one of the cells of the grid - the border of the cell will then become bounded in an orange dashed line to indicate that it is now the active cell.
5. In the left hand panel all fields for that page of the form will be displayed. Simply click on the fields you want to be added to the active cell.
6. Keep activating cells and adding fields until all fields for the page are sitting within a cell. Then click the green Save button top left.
7. You can drag fields between cells to change the layout until you are happy. Please keep Saving the changes to avoid losing them.
8. To view changes made you can slide the bottom half of the split screen up and down as required.
9. Rows along with their set columns (1, 2 or 3) can be dragged to a higher or lower vertical position using the grey 'drag' button to the right of the Section Title box. Please click Save after changing a position. Individual cells cannot be dragged - only complete rows with their columns.
Please note : if any new fields are added to a page with an existing grid layout already set up then the new field will automatically be allocated to the last cell on the page - this is so that it would by default be visible to the person filling the form in.
Any fields not allocated to a cell will NOT be visible to the user of the form. To place the new field into the required cell simply drag it from the last cell in the grid to the required cell and click Save.